Food Fight! Now Carries Rescue Rub


IMG_1952

One of my favorite grocery stores, Food Fight! (vegan grocery store) is now carrying Rescue Rub! They are carrying Boo Boo Balm and Sore Muscle Salve. I’m super happy because this is actually benefiting two amazing farm sanctuaries: Green Acres Farm Sanctuary and Out to Pasture Sanctuary. If you are in the Portland area and didn’t know that Food Fight! opened up a second location (on Halsey and NE 112th) you should come and check it out. Both locations are carrying Rescue Rub. Plus there is a new vegan coffee shop next to their new location, Jet Black Coffee. I got a decaf mocha and it was amazing!!!

Here is some more information on the two products they are carrying:
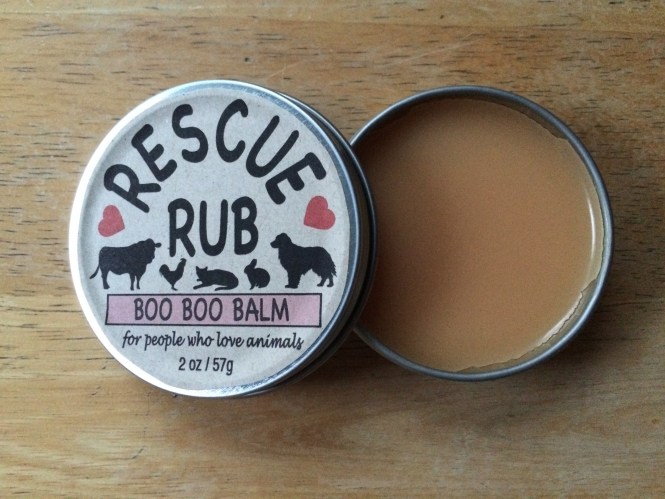
BOO BOO BALM:

  • Rescue Rub Boo Boo Balm is a totally vegan and organic salve made with calendula and St. John’s Wort infused extra virgin olive oil and candelilla wax (from the wax slipper plant). This is more of a ointment/salve combination.

    Candelilla wax gives protection over cuts, scrapes and burns.

    St. John’s Wort:

  • An amazing herb for healing burns and injury to the skin. It has many anti-viral and anti-bacterial properties. For healing tissues while alleviating pain as well.

    Calendula:

  • Great herb for healing trauma and reducing inflammation. It promotes cellular repair and is great at healing wounds. Gentle for all skin including babies and good for any skin irritation.

    Lavender Essential Oil:

  • Anti-microbial and anti-viral. It has a balancing affect of promoting circulation and also promoting relaxation.

    Chamomile Essential Oil:

  • Promotes relaxation and is anti-inflammatory. It is safe and soothing for all ages and promotes healing.

    Directions: Use on any minor scrapes, wounds, and burns. If the skin has a deep gash or severe burn please get medical attention. Since this is a medicinal grade salve do a patch test first. Can put Boo Boo Balm around an injury instead of over if the injury is too deep.

IMG_1949

Boo Boo Balm-For Adults to Babies!

SORE MUSCLE SALVE:

  • Rescue Rub for Sore Muscles is vegan, organic and non-GMO. The base is unrefined shea butter, extra virgin olive oil and candelilla wax from the Mexican wax slipper plant. These are hypoallergenic and non comedogenic. Shea butter is full of Vitamin E, is great for all skin types and very soothing. Extra virgin olive oil is loaded with antioxidants like Vitamin A and E, also great for all skin types.

    Arnica:

  • Arnica is great for healing trauma and injury. It can be used topically for sprains, strains, superficial burns, and relief of arthritis. Arnica is anti-inflammatory, analgesic and antimicrobial.

    Eucalyptus Essential Oil:

  • Anti-inflammatory, antispasmodic, decongesting, antibacterial and stimulating. This helps to promote blood flow to promote localized healing.

    Peppermint Essential Oil:

  • Considered to be cooling, reduces heat and inflammation around an injury. Very aromatic so it increases localized circulation and blood flow to promote healing.

    Rosemary Essential Oil:

  • Great for reducing both acute and chronic pain. Can help with boosting our immune system and alleviating pain from arthritis.

    Cinnamon Essential Oil:

  • Very warming to promote circulation, this warming ability is what really helps to relieve pain and balance the cooling properties of the other oils.

    Directions: Use on any tight/sore muscles, chronic pain, arthritis, strains, sprains and trauma. Since this is a medicinal grade salve do a patch test first. Also avoid contact around eyes or open wounds and mucous membranes.


Hope you can stop by Food Fight! to check out their awesome stores and then you can even get some salve too! If you aren’t local you can order my salve on etsy.

Holiday Body Products Class

Some of the products we made in the Body Product Class

A great Holiday Class on making all natural vegan body products for gifts or for pampering yourself! This class will be about 2 hours long taught by Genevieve Johnson, L.Ac. with snacks and tea provided. We will make: a spicy body scrub, face cream, facial toner and fresh feet salve.

When: Saturday, December 13th at 10:30 am – noonish

Where: This class will be located at the An Sen Clinic, 4424 NE Glisan, Portland, Oregon 97213. Registration is limited, please email Genevieve at genevegan@hotmail.com to confirm registration.

Cost: $30/person… you get a container of body scrub, face cream, toner, and foot salve. And the chance to personalize/decorate your containers for gifts.

Delicious Summer Soup (Hot or Cold)

Summer Soup... Yummy!

Summer Soup… Yummy!

I love summer time with all the fresh veggies and farmers markets. I am super lucky that there is a local farmers market, Cannon Beach Farmers Market. I do a CSA (community supported agriculture) box with Kingfisher Farms and get an abundance of local, organic goodies. This is a soup made from those treasures…

Delicious Summer Soup (serve hot or cold)

  • 2-3 large tomatoes
  • 1 red pepper
  • 1 zucchini
  • 1/4 cup raw sesame seeds (could substitute with cashews, hemp seed, sunflower seed, etc.)
  • 2-3 cups of water (more or less depending on how creamy you like it)
  • salt to taste (I actually used liquid aminos because I prefer the taste)
  • chipotle (just a dash… more if you like it spicy)
  • 3-4 cups chopped greens: kale, chard, arugala (whatever yummy greens you have on hand)
  • 1/4 cup finely chopped onion or chives

Blend the tomatoes, red pepper, zucchini, sesame seeds and water in blender until smooth and creamy. Then add salt and chipotle to taste. You can heat this up if you would like or just super chop the greens and onion, add to the soup and serve… Enjoy!!!

Super Low-Fat Strawberry Ice Cream (Vegan of Course)

Super Low-Fat Strawberry Ice Cream

Super Low-Fat Strawberry Ice Cream

It was a warm night… and I was craving something cold and sweet. How about some strawberry ice cream!!! This would be a snap to make if you have an ice cream maker, but if not do not fret… Just blend all the ingredients, freeze and blend again. Still quick and easy! This ice cream has just over 100 calories/serving making it super low calorie, and guilt-free!

Strawberry Cashew Ice Cream (1 pint)

  • ½ c. cashews
  • 1/2 pint strawberries
  • 1 teas. vanilla
  • 1-2 TBS agave or maple syrup for added sweetness (optional)
  • 1 ¼ c. water (approximate, see directions below)

-Soak cashews to soften, then add all ingredients including only enough water to make 2 c. total or 1 pint. Amazingly ice cube trays hold exactly 2 cups! Blend until creamy and either use ice cream maker or pour mixture into ice cube tray, freeze and blend again until smooth.

A Perfect Breakfast for Summer Solstice… Banana Flax Crepes with Strawberries!!!

Banana Flax Crepes with Soy Yogurt and Fresh Strawberries

Banana Flax Crepes with Soy Yogurt and Fresh Strawberries

I love this time of year!! It’s when I get to go the Farmer’s Market and always have super fresh delicious produce. Today even when I first woke up (before 6am) it was already a sunny gorgeous day at the beach! How lucky I am to be here.

Last night before falling asleep I was dreaming of what I wanted to make for breakfast and it came to me… crepes!! Topped with lots of fresh strawberries! YUM… no wonder I woke up so early excited to make a scrumptious meal.

Banana Flax Crepes (makes 3-4)

  • 1 cup Bob’s Gluten Free Flour
  • 1/4 cup whole flax seeds (grind into flour/meal)
  • 1/2 ripe banana
  • 1 teaspoon vanilla
  • sprinkle of salt
  • water (enough added for crepe batter consistency-thinner than pancake batter)

Grind whole flax seeds into meal and add to GF flour. Mash up ripe banana before adding to powdered ingredients. Then add vanilla, salt and water. Start with a small amount of water and work your way up to desired consistency. You will have to add more water than you think because the flax will just keep soaking up that water.

Heat a skillet to medium heat and add some coconut oil to coat the pan. Then pour some of the mixture in and spread out in a circle as thin as possible. No need to flip… the crepe is done when you can tell there is no raw dough on the surface. Then top with soy yogurt and fresh berries… Enjoy!!!

Quickest Carrot Cake Ever!!!

Carrot Cake with Cashew Cream Cheese Frosting

Carrot Cake with Cashew Cream Cheese Frosting

So I have really been into juicing lately… and of course that means tons of carrot pulp, usually I just compost it. One time I did try to make soup with it, but don’t ever make that mistake… super grainy and all the juice was out of the carrots so the soup was NOT sweet and creamy like it normally is. I know there are a ton of recipes out there for using carrot pulp for the fluffy consistency of raw, dehydrated cookies, but really I wanted something sweet and QUICK!

I happened to have Bob’s Red Mill Gluten Free Vanilla Cake Mix on hand, so I thought to myself… “why not try to make it carrot cake?” I juiced 4 carrots and added the juice back to the pulp. Then I dumped in the whole cake mix and eventually it turned into thick cake consistency. I did add a couple of other things and they are in the recipe below. I love cashew cheesecake, so I made a variation for a Cashew Cream Cheese Frosting and DELICIOUS!!!

Carrot Cake Recipe

  • Bob’s Red Mill Vanilla Cake Mix
  • 4 carrots (juice and pulp mixed)
  • 1 1/2 teaspoon cinnamon
  • 1/2 teaspoon nutmeg
  • 1/2 teaspoon pie spice
  • Optional: coconut flakes, chopped dates, raisins, pecans, whatever you like!

Juice 4 carrots and mix the juice and pulp together. Then mix in all the other ingredients until uniform in consistency. Use coconut oil to oil the pan (to avoid sticking). Bake at 325 for 20-30 minutes (depending on pan size and oven size)

Cashew Cream Cheese Frosting

  • 1/2-1 cup raw cashews
  • juice of 1/4-1/2 lemon (depending on how lemony you like it, and a little zest never hurt anyone)
  • 2 TBS maple syrup or agave
  • 1/2 teaspoon vanilla
  • 2 TBS coconut oil (unrefined organic tastes best)
  • water (just enough to make creamy)

If you are using a food processor to make frosting then I would highly recommend soaking cashews for at least 4 hours prior. I used my vitamix and didn’t have the foresight to soak beforehand and it still turned out super smooth. When you refrigerate this frosting it will thicken or if you use more cashews. I liked it more like a glaze when I first made it and then after refrigerating it was thick like a super buttery frosting. Just use frosting as needed and don’t put on the whole cake (since you need to refrigerate the frosting and that would dry the cake out). Top piece by piece and enjoy!

Loving the Falafel

Baked Falafel (coated in flax meal) with Tabouli

Baked Falafel (coated in flax meal) with Tabouli

Last week we had another great Creative Healthy Cooking Class… the theme was Lebanese cuisine, and WOW was it delicious!!! We made baked and lightly sautéed falafel balls. The baked ones (that look fried) are actually covered in freshly ground flax meal to really up the nutritional profile… not that the dinner needed it with all that parsley. We also made tabouli, tahini sauce (with unhulled sesame seeds to maximize the calcium content), and of course hummus.

Falafel (serves 4)

  • 2 cups garbanzo beans (sprouted first, then cooked 10 minutes)
  • 2-3 garlic cloves
  • ¼ small onion (chopped)
  • 1 cup fresh parsley (chopped)
  • 1 teaspoon cumin
  • 1 teaspoon coriander
  • ¼ teaspoon salt
  • 4 TBS flax seed

Grind the flax seed to make flax meal and set aside. Then add all other ingredients into a food processor and blend until uniform in consistency. Should be able to form mixture into balls (slightly larger than golf ball size). Then take flax mixture to coat the outside of falafel balls and bake in oven at 350 for 15-20 minutes until crispy. Enjoy with tahini or in a sandwich, wrap or on top of a salad.

*Instead of baking you can also flatten balls slightly and sauté in coconut oil lightly on each side and enjoy! (Pictured below)

Tahini Sauce (serves 4)

  • 4 TBS sesame seeds (try to use unhulled)
  • juice of ½ lemon
  • ½ cup water
  • 1-2 garlic cloves
  • salt or liquid aminoes to taste

Blend ingredients together in blender until smooth consistency. Can add lemon zest for more lemony flavor as well. Makes a great salad dressing (if you add a little more water and vinegar) or use as a dip for veggies or to slather on steamed greens… delicious!!

Falafel lightly sauteed in coconut oil topped with tahini sauce

Falafel lightly sauteed in coconut oil topped with tahini sauce

My Favorite Meal Ever!!!

Portobello with Bok Choy and Yams

Portobello with Bok Choy and Yams

Okay so I am not completely sure if this is my favorite meal ever… but it has to be in the top 3. I made this the other night after going to the grocery store kind of hungry and well, I picked out my favorite foods. Portobello mushrooms, baby bok choy, and yams were the highlight of this meal. I love making portobello mushroom steaks because they are so versatile; you can get creative with cooking techniques and what to seasoning you’d like to use. Since I had the baby bok choy I decided to go a little more Asian themed, but I have also made this dish in the winter with cooking wine and making a thick mushroom gravy to go over the top. Since it is Spring and lighter foods are in order, the gravy was just from the sauted onion and garlic, liquid aminos and celery to make a nice broth that I poured over the top. Another reason I love this recipe is it gets converts: when I first met my husband he told me the two foods that he didn’t like were mushrooms and yams and every time I make this dish he freaks out about how amazing it is!!!

Portobello Mushroom Steaks (serves 2)

  • 2 Portobello mushrooms
  • 1/4 medium onion
  • 2-3 cloves of garlic
  • 1 teaspoon toasted sesame oil
  • 3-4 TBS liquid aminos (soy or coconut)
  • 1-2 celery stalks (finely chopped)

Add a couple tablespoons olive oil to large sauce pan to saute onion and garlic lightly. Then add a couple cups of water with the liquid aminos and mushrooms. Cover and steam for 5 minutes. Then add baby bok choy and celery and steam for another 3-5 minutes depending on how well you like the greens cooked. The gravy is the liquid from all the steamed and sauteed veggies… you can thicken it if you like or serve as is. I love making a gravy with pumpkin seeds, but you can use walnuts, cashews, hemp seeds, sunflower seeds… any seed of your choice. Check out a recipe for Pumpkin Seed Gravy in part of my Fall Cooking Class Series.

Cube a large yam and boil in separate pot while cooking up the mushroom steaks so everything is done at the same time. You can just mash them up or add Earth Balance Vegan Butter to make them even creamier. Remember be creative: use different greens, try other seasonings… have fun experimenting.

When everything is done I like to pour the gravy over the top of it all and enjoy this amazing dish!!!

My Ideal Day… Yoga, Buckwheat Pancakes, Green Smoothies and More!!!

Today started out by going to Yoga… there is a lovely yoga studio in town called Cannon Beach Yoga Arts. You can check out their schedule here. Anyway I took a Vinyasa yoga class to start off my day. All I had before class was some peppermint tea to help me hydrate and detox (ie. sweat more) in the class. In Chinese Medicine we use peppermint to release the exterior and it is slightly cooling in nature. Releasing the exterior typically means promote sweating, but it is also helpful in the first stages of a cold or flu. Western herbalism uses peppermint in a different way; to regulate peristalsis in the intestines and soothe an upset stomach. The essential oil is also helpful for headaches and clearing the sinuses too.

Okay enough on the properties of peppermint. Here is how my day was ideal… tea, yoga, and then on my bicycle ride back home it was slightly cool so I wanted something warm for breakfast. We had just gone to Bob’s Red Mill in Portland and had a ton of raw buckwheat, so I decided on buckwheat pancakes. We had the buckwheat in it’s whole form, so I blended it up dry in the vitamix for only 10-20 seconds and used the flour/meal to make delicious blueberry pancakes. After enjoying the pancakes I made a green smoothie and off to work I went. The pancake recipe is a small one so you may want to double it.

Blueberry Buckwheat Pancakes

Blueberry Buckwheat Pancakes

Blueberry Buckwheat Pancakes

  • 1 cup raw buckwheat (ground=1 1/2 cups)
  • 2 teaspoons baking powder
  • sprinkle of cinnamon (I almost always add cinnamon to blueberries or lemon zest)
  • dash of salt
  • 1 teaspoon vanilla extract
  • 1/4 – 1/2 cup applesauce
  • 1/2 cup blueberries
  • enough water to get the pancake batter consistency

Mix dry ingredients first and then mix in wet. The consistency you are looking for is like a runny oatmeal. Start with adding just a little water and then slowly add just enough for the right consistency. Use a large pan or skillet on medium heat and put some coconut oil in the pan to coat the bottom. Coconut can tolerate medium to high heat so it’s great for making pancakes. Flip the cakes when one side is browned to your liking and enjoy!!! I love maple syrup and sometimes I will take a small pan and heat up the blueberries and a little maple syrup to make blueberry syrup and it’s delicious!

Pear, Mango and Spinach Green Smoothie

Pear, Mango and Spinach Green Smoothie

Pear Mango Spinach Smoothie

  • 2 ripe pears
  • 1/2 ripe mango
  • 2 cups spinach packed (or other greens)

Place all ingredients in blender and add 1-2 cups of water, just enough to blend to a uniform consistency. This is my favorite smoothie to date since it tastes so much like pear, and I LOVE pears!!! It made 6 cups of smoothie, enough to have a couple cups in the morning and take a big jar to work for my lunch. After work I am going to make my favorite meal ever!!! Portobello mushroom steaks, yams, and greens… recipe to be posted soon.

Super Fast and Delicious Tomato Bisque

Tomato Bisque with a Kick

Tomato Bisque with a Kick

After coming home to make dinner… I was kind of tired and wanted something quick. Well I didn’t realize how fast I could actually make dinner (under 7 minutes). It was a tomato bisque with a kick! You can make it without the serrano pepper too and it is great regardless. I topped the soup with a delicious garlic infused cashew sour cream, and YEAH!!! I actually made the sour cream first and put it in the freezer while I made the bisque. Then I didn’t even clean out the blender very well so I still had enough cashew cream to make the bisque nice and creamy. Add some cilantro on top because it is good for detoxifying and tastes great too!

Tomato Bisque

  • 1 -28 oz. can of organic diced tomatoes (I can’t wait until it’s summer for fresh tomatoes)
  • 1 cup water
  • handful of raw cashews (optional, but make creamier)
  • 1 Serrano pepper (optional for a kick)

Blend these up in a blender and then heat on stove until desired temperature. You can even add some fresh or frozen corn to give it more texture and a slightly sweeter flavor. I added corn because the serrano was a little too spicy for me.

Garlic-Infused Sour Cream

  • 1 cup raw cashews (soak them first if you don’t have a high-speed blender)
  • Juice of 1/2 lemon
  • 1 garlic clove
  • pinch of salt

If using a high speed blender add a little bit of water and blend until super thick and creamy (almost as thick as sour cream). Then put in freezer while heating up soup to thicken and spoon it on top. If using a food processor make sure to soak the cashews ahead of time (at least 4 hours… can even soak overnight for convenience) and only add water as needed. You may want to double this recipe to have some amazing sour cream on hand… keeps in refrigerator for about a week.